
Decorative Paper Wall Art Ideas

- Creative Techniques for Decorative Paper Art
- Choosing the Right Type of Paper
- Step-by-Step Guide to Crafting Wall Art
- Designing Unique Patterns and Shapes
- Tips for Displaying Your Paper Art
When diving into the world of decorative paper art, it’s essential to explore creative techniques that can elevate your projects from simple crafts to beautiful wall decor. Paper offers a versatile medium that can be manipulated in countless ways, making it an ideal choice for artists and crafters alike. One innovative technique involves layering different colors and textures of paper to create depth and dimension. Start by selecting a base paper that will serve as the background, and then cut out shapes from contrasting papers. When you layer these cutouts, using foam dots can help raise elements off the surface, making your art pop.
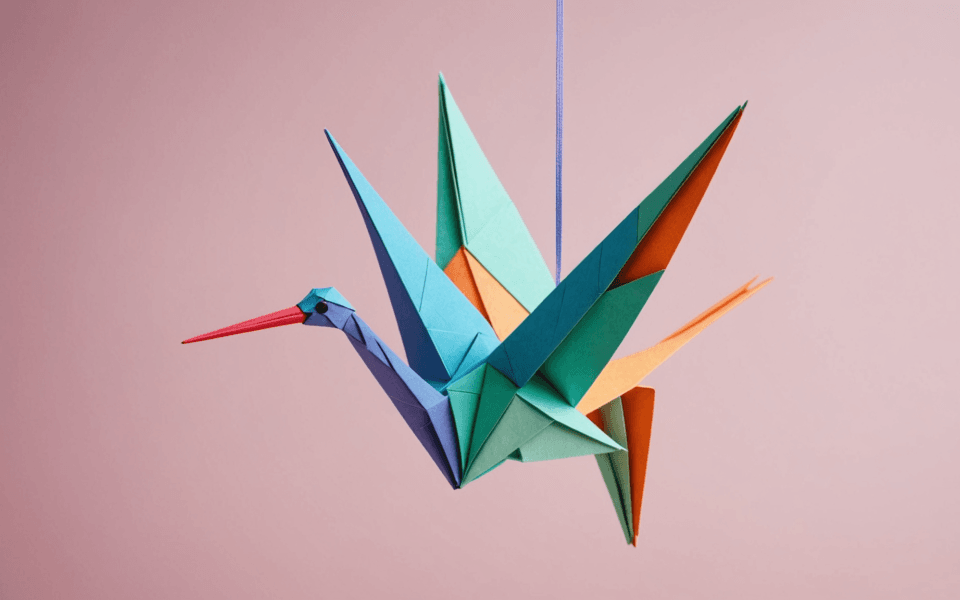
Another exciting technique is the use of origami folds within your paper art. Incorporating folded paper elements into your designs adds an interactive aspect to your pieces, encouraging viewers to engage with them. For example, you could create a serene scene where cranes are suspended in the air, gracefully folded from vibrant paper. This not only enhances the visual interest but brings a striking three-dimensional aspect to your wall decor.
Don’t shy away from using mixed media in your creative projects—combining paper with other materials can lead to fascinating results. Think about adding textiles or even natural elements like pressed flowers alongside your paper art. The juxtaposition of textures can bring warmth to a piece, making it feel more inviting. Stencils can also be a wonderful way to achieve intricate patterns, and by using a craft knife, you can cut out designs that allow the contrasting base to show through, lending a stunning quality to your overall wall art.
Lastly, incorporating innovative techniques such as marbling or watercoloring your paper can add unique variations to each project. These methods give a sense of spontaneity, allowing you to embrace the happy accidents that occur during creation. When the final product is displayed, the vibrant swirls and patterns in your artwork will undoubtedly capture the attention of anyone who walks by, making your space feel both artistic and personal. With these creative techniques at your disposal, the possibilities for paper art are as boundless as your imagination.
Choosing the Right Type of Paper
Choosing the right type of paper is a crucial step in creating stunning decorative paper wall art. The texture, weight, and finish of the paper can significantly influence the overall aesthetic and durability of your projects. Different paper types cater to various techniques and styles, so it’s important to consider how each will interact with your artistic vision.
Start with basic construction paper, which is readily available and comes in a myriad of colors. This type is ideal for beginners and can be used for layering or cutouts without breaking the bank. If you’re aiming for a more textured finish, consider using textured cardstock or specialty papers such as rice paper or mulberry paper. These options add visual interest and depth and often work beautifully for intricate designs.
For those looking to add a more refined touch to their wall decor, consider using handmade papers. These often feature unique fibers and variations, resulting in one-of-a-kind pieces that can’t be replicated. They can also be further embellished with watercolors or inks to create even more visually striking designs.
When crafting with paper, weight is another factor to keep in mind. Lighter papers, such as printer paper or standard scrapbook paper, are suitable for layering but may not hold up well for more complex 3D elements. Heavier papers, like chipboard or artist-quality paper, offer sturdiness for projects that require additional support and dimension.
Finally, don’t overlook the significance of color and pattern. Select papers that complement your existing decor while also enhancing the visual narrative of your paper art. Consider incorporating patterns that harmonize with the theme of your creative projects; floral prints may work beautifully in a nature-inspired design, while geometric patterns could enhance a modern aesthetic.
- Experiment with various types of paper, including construction, cardstock, and specialty papers, to find what works best for your project.
- Utilize handmade papers for a unique and textured finish that adds character to your wall art.
- Pay attention to the weight of the paper; choose lighter papers for layered elements and heavier options for sturdy 3D designs.
- Consider the color and pattern of your papers to ensure they align with your overall decor and creative vision.
- Don’t be afraid to mix different types of paper in your projects to achieve exciting visual contrasts and depth.
Step-by-Step Guide to Crafting Wall Art
 When beginning your crafting journey, one common mistake is rushing through the preparation stage. Ensuring that your workspace is organized and that you have all necessary materials before you start can save you time and frustration. Measure and cut your paper pieces carefully; uneven sizes can throw off the balance of your wall decor. A paper cutter or sharp scissors will make this process easier and lead to cleaner edges.
Another pitfall is not considering the weight of the paper when layering. If you’re using lightweight papers for multiple layers, they may not adhere well or might sag over time. To avoid this, use a strong adhesive suitable for paper crafts, such as double-sided tape or a glue stick specifically designed for paper art. This ensures your creations remain intact on the wall and maintain their intended design.
Additionally, many crafters overlook the importance of drying time when using wet mediums, such as glue or paint. Rushing this process can result in smudging and uneven finishes. Be patient and allow ample drying time between layers, especially if you’re incorporating moisture into your creative projects. If possible, work on multiple pieces at once, using the time to let one dry while progressing on another.
Not paying attention to the arrangement of the pieces before permanently affixing them can also lead to dissatisfaction with the final layout. Take the time to lay out your design on the wall or a flat surface before attaching anything. This allows you to visualize the overall look and make adjustments if needed without committing to the arrangement too soon.
Lastly, remember to step back and assess your work periodically during the crafting process. It’s easy to get caught up in the details and miss how the entire piece is coming together. Taking breaks to view your work from a distance gives you a fresh perspective and can help identify any elements that need tweaking for better harmony in your wall decor. By avoiding these common mistakes, you’ll enhance your crafting experience and elevate the quality of your decorative paper art.
Designing Unique Patterns and Shapes
Designing unique patterns and shapes in decorative paper art allows you to express your creativity while adding a personal touch to your wall decor. The key to crafting compelling designs lies in exploring different shapes, textures, and color combinations that resonate with your vision. Start with the foundation of your art piece—this could be a simple geometric shape or an organic form inspired by nature. Consider using a variety of templates as a guide, but don’t hesitate to modify them or create entirely original shapes. This experimentation forms the basis for truly unique art.
One popular approach is to create a layered effect using cutouts of varying sizes. Begin by sketching your initial design on a piece of paper and then cut out your patterns. When layering, introduce contrasting colors and textures to enhance depth. For example, pairing smooth, glossy paper with a matte finish can create dynamic visual interest. The play between different finishes can lead to stunning three-dimensional effects that draw the eye.
Another way to innovate your designs is by incorporating symmetry or asymmetry. Symmetrical patterns exude balance and harmony, making them pleasing to the eye. On the other hand, asymmetrical designs can evoke dynamism and excitement within your paper art. Experiment with both to find which best suits the mood you want to convey in your space. Incorporating elements like negative space—areas left blank—can also boost the impact of your design by giving the eye a place to rest.
When crafting specific shapes, consider using techniques like folding, rolling, or twisting the paper. These methods can bring your designs to life, transforming flat paper into textured sculptures that stand out on the wall. Think about creating flowers with layered petals or spiraling tendril shapes that seem to dance off the surface, adding waves of movement to your decor.
To further personalize your creations, integrate patterns and motifs that hold significance to you. Whether they’re geometric designs, floral patterns, or abstract shapes, these will infuse your paper art with meaning and personality. You can also play with color palettes that reflect your style or the ambiance of the room where the art will be displayed. Harmonizing colors can unify the artwork, while contrasting shades can add excitement and energy.
Embrace the process of trial and error; the path to unique designs is often paved with creative risks. Feel free to recycle failed attempts, transforming mistakes into learning experiences or even new art pieces. Every cut, layer, or twist can lead to unexpected discoveries in your artistic journey. Keep pushing the boundaries of your imagination and enjoy the power of paper art as you create stunning wall decor that tells your story!
Tips for Displaying Your Paper Art

- How do I decide where to display my paper art?
- Consider the size and color of your art pieces in relation to your wall space. A larger piece can become a focal point, while smaller works are great for gallery-style arrangements. Look for areas with good visibility and lighting to enhance the appeal of your wall decor.
- What materials do I need to hang decorative paper art?
- To hang your paper art, you’ll typically need adhesive hooks, picture frames, or even washi tape for a more casual look. Ensure that whichever method you choose is suitable for the weight and size of your pieces to prevent damage to both the artwork and your walls.
- Can I use paper art outdoors?
- While some paper art can be displayed outdoors, it’s essential to consider exposure to elements like sunlight and moisture. Use weather-resistant coatings and avoid direct sunlight to prevent fading and deterioration. Generally, paper art is best suited for indoor environments.
- How do I protect my paper wall art from damage?
- To protect your paper art, consider placing it under glass frames or using protective spray coatings suitable for paper. Keep it away from direct sunlight and high humidity to prevent fading and warping, ensuring that your creative projects last for years.
- What kind of lighting works best for displaying paper art?
- Soft, indirect lighting is ideal for highlighting the textures and colors of paper art. Avoid harsh overhead lighting that can create glare; instead, consider using spotlights or wall sconces to enhance the display.
- Can I mix paper art with other types of decor?
- Absolutely! Mixing paper art with other materials, such as metal or wood, can create a dynamic and interesting display. Just ensure the styles complement each other and maintain a cohesive aesthetic throughout your space.
- How can I change my paper art display seasonally?
- Rotate your displayed pieces to reflect seasonal themes, colors, or holidays. This can be as simple as swapping out art pieces or creating new designs that celebrate the season. Keeping your decor fresh and relevant keeps your space feeling vibrant and engaging.