
DIY Paper Crafts Using Recycled Paper
- Creative Uses for Recycled Paper
- Materials Needed for Paper Crafts
- Step-by-Step Guide to Making Paper Mache
- Fun Projects for Kids and Adults
- Tips for Enhancing Your Paper Crafts
When it comes to unleashing creativity with recycled paper, the possibilities are nearly endless. One of the most delightful aspects of using paper crafts made from repurposed materials is the unique character each piece exudes. By transforming something of little value, like old magazines, newspapers, or cardboard boxes, into beautiful handmade items, we not only encourage sustainability but also celebrate the art of crafting in a way that’s both engaging and fulfilling.
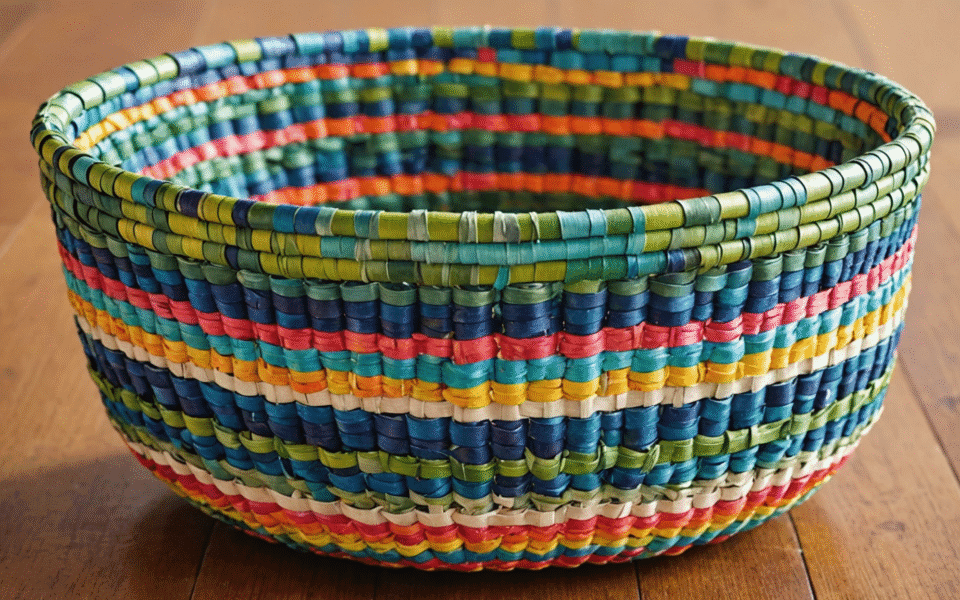
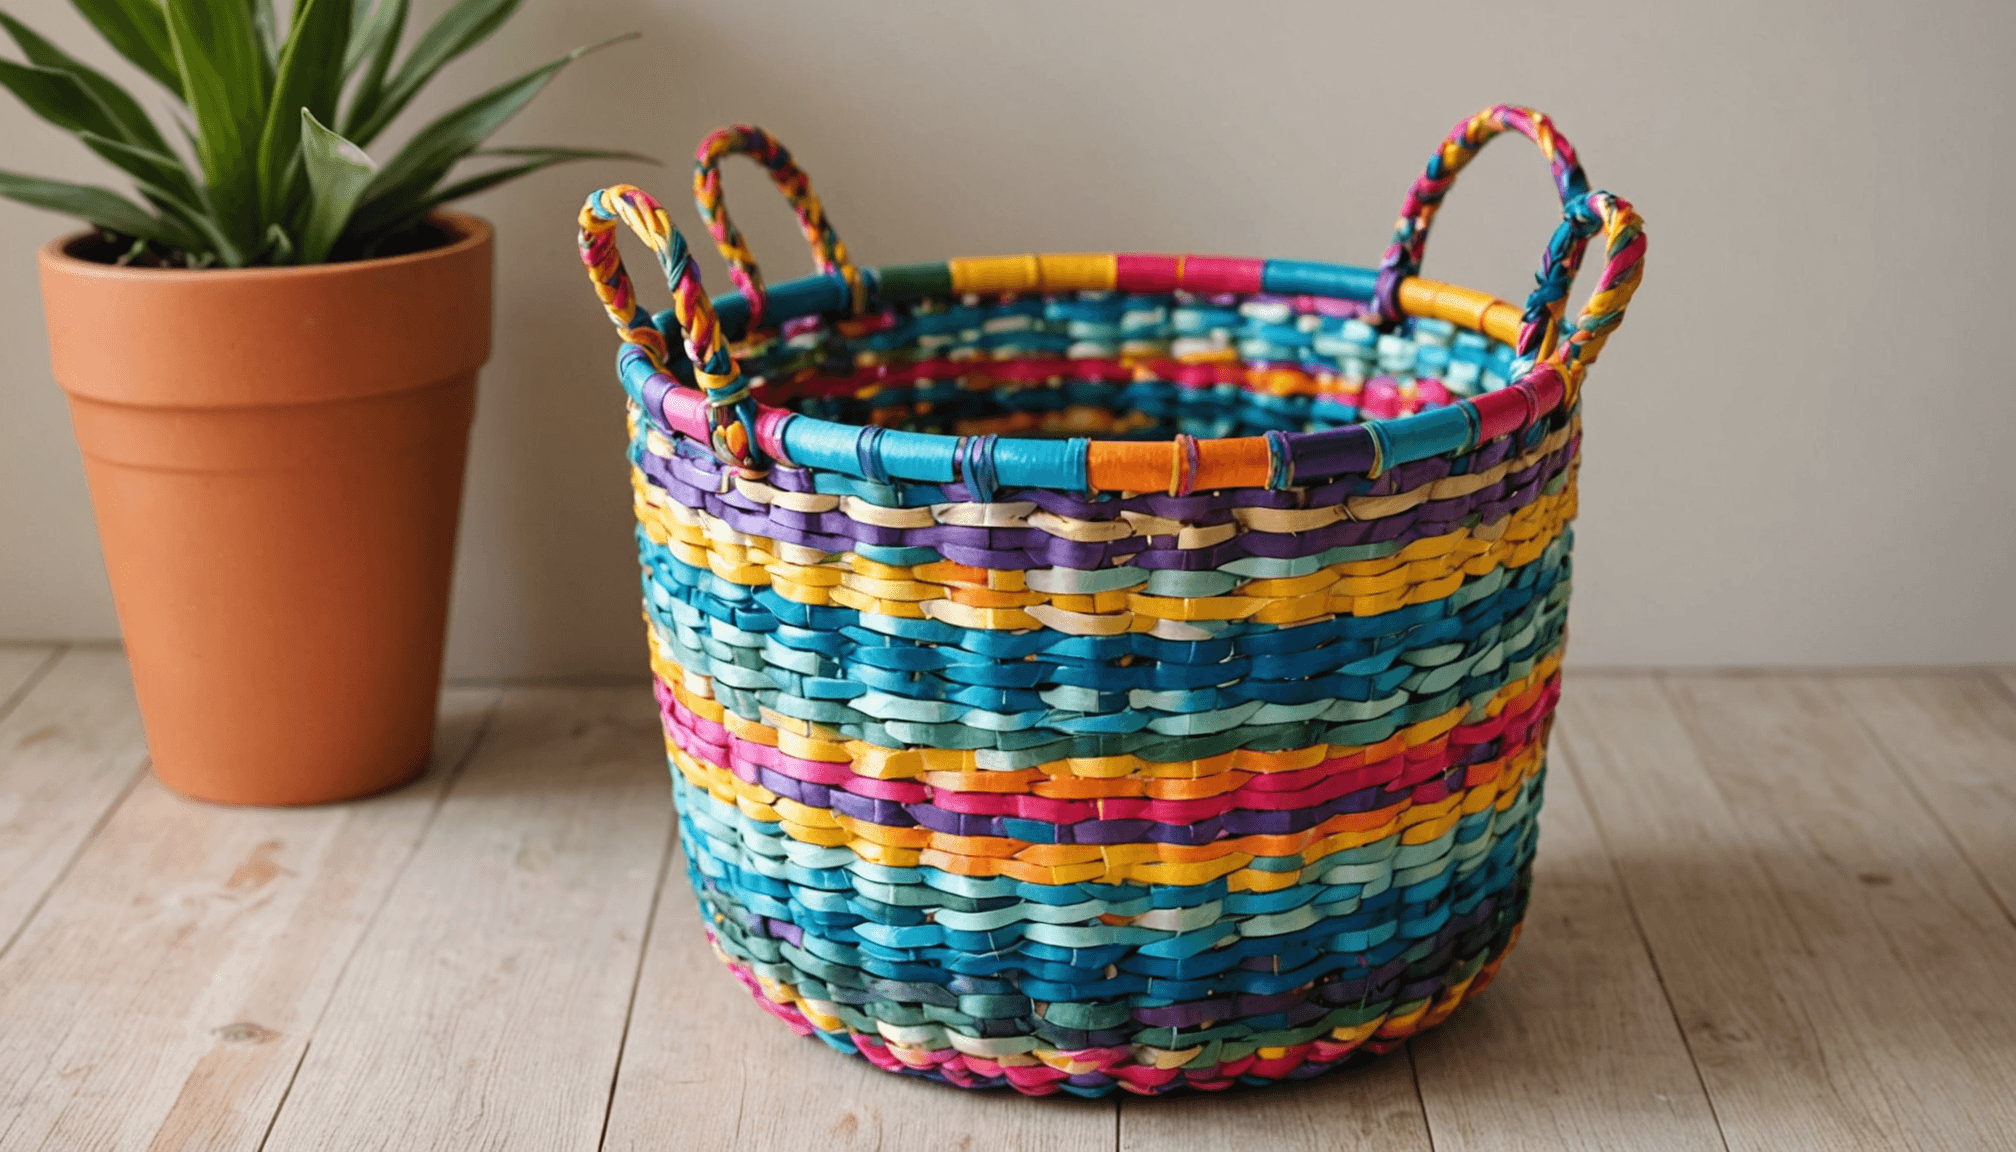
Imagine this: a simple magazine page can be cut into strips and woven into an eye-catching basket. Each swirl of color adds a cheerful pop, and you’ll find joy in the process as your fingers work through the folds and twists. Alternatively, you can create intricate collage art by tearing colorful pages into shapes and layering them to form vibrant scenes or abstract designs. This approach not only recycles material but allows for a personal touch that store-bought art can never replicate.
For the lovers of embroidery and cross-stitch, envision using recycled paper as a canvas for your next thread project. You can stitch designs directly onto heavier paper or even use paper as the background for framing fabric embroidery. The contrast between the softness of the threads and the sturdiness of the paper creates a stunning visual dynamic. It opens up an exciting realm of mixed-media art, where traditional stitching meets imaginative repurposing.
If you’re looking for something more functional yet stylish, consider crafting greeting cards or gift tags from recycled materials. Cut your favorite images and patterns from magazines or colored cardboard, and assemble them into unique colorful creations that not only serve a purpose but also provide a personal touch in gifting. Adding a handwritten message on the inside becomes a cherished gesture that recipients are sure to appreciate.
Another fantastic idea is to create decorative flowers from paper, perfect for home décor. Take vibrant pages and cut them into petal shapes, then layer them together to form a blossom. By using recycled paper, you can craft seasonal arrangements that bring color into your space without the guilt of disposability. A bouquet of these can brighten any room and serves as a conversation starter about sustainable crafting.
These creative uses for recycled paper inspire not only personal projects but also can turn into social activities. Organizing crafting sessions with friends or family will foster creativity while emphasizing environmental consciousness, making for memorable experiences together. Engage in challenges like “only recycled materials” to push your ingenuity further and discover talents you didn’t know you had. Each crafted piece tells a story and connects you to others who share a love for eco-friendly DIY projects.
Materials Needed for Paper Crafts
When embarking on your paper crafts journey, having the right materials is essential to ensure a smooth and enjoyable crafting experience. To get started, you will need to gather a variety of supplies that can enhance your projects and allow your creativity to flow. Here’s a comprehensive list of materials you’ll want to have on hand:
1. Recycled Paper: The primary ingredient! Old newspapers, magazines, wrapping paper, and colored cardboard are perfect for creating beautiful crafts. Look for paper that has interesting textures or patterns to add depth to your projects.
2. Adhesives: Various types of glue will serve different purposes. White school glue is great for general projects, while glue sticks are perfect for adhering lighter paper. For more substantial materials, consider using craft glue or tacky glue.
3. Scissors: A good pair of scissors is indispensable for cutting paper into various shapes and sizes. Consider having a few types, including regular scissors for straight cuts and decorative edge scissors for unique patterns.
4. Craft Knife and Cutting Mat: For precision cutting, a craft knife paired with a cutting mat can help you achieve clean, intricate lines and make more detailed designs.
5. Ruler and Pencil: These tools are essential for measuring and marking straight lines to maintain accuracy in your paper crafts. A metal ruler will help avoid any slips when using a craft knife.
6. Decorative Items: Enhance your projects with embellishments such as stickers, washi tape, ribbons, and buttons. These tiny details can transform a simple paper piece into a stunning work of art.
7. Watercolor or Acrylic Paints: If you wish to add some color to your recycled projects, having a set of paints can help you customize your designs further. Use them to paint patterns or add details to your paper crafts.
8. Other Tools: Depending on your specific project, tools like a bone folder for creasing, a hole puncher for making holes, or a stapler for binding can be beneficial.
Being prepared with these materials will make your crafting experience much easier and more enjoyable. You’ll find that having a well-stocked crafting corner not only sparks creative ideas but also instills a sense of readiness for any spontaneous DIY project.
- Old newspapers and magazines can provide a wealth of textures and colors, perfect for a range of crafts.
- Keep a dedicated crafting box to organize your materials, ensuring everything is easily accessible.
- Experiment with different adhesives based on the materials you are working with to achieve the best results.
- Always cut away from your body when using sharp tools for safety.
- Consider hosting a crafting party to inspire creativity and help others discover the joy of eco DIY projects.
Step-by-Step Guide to Making Paper Mache
 When making paper mache, people often make common mistakes that can lead to unsatisfactory results. One frequent issue is using the wrong type of paper. While any paper can technically be used, thinner papers like tissues or standard printer paper can break down too quickly and may not hold the structure you need. Instead, opt for sturdier paper, such as newspapers or magazines, which provide better durability and create a stronger final product.
Another common error is not adequately preparing the paper strips. If the strips are too wide, they can dry unevenly and complicate the shaping process. It’s best to cut the paper into narrower strips, about one to two inches wide. This helps the paper grip the form better and makes it easier to manipulate.
Many beginner crafters also overlook the importance of the adhesive mixture. Using too much glue will make the paper too soggy and heavy, leading to a longer drying time and potential collapse of the structure. Conversely, too little glue might not saturate the paper sufficiently, resulting in weak connections. A balanced mixture of glue and water, typically at a ratio of one part glue to one part water, offers the best consistency for effective coverage.
Drying time is another critical aspect that is frequently underestimated. Rushing this process can compromise the integrity of your paper mache project. It’s vital to allow ample time for each layer to dry fully before adding another. A good rule of thumb is to wait at least 24 hours after applying each layer, depending on the humidity in your area. Proper drying ensures a solid, stable structure suitable for painting and decorating later on.
Additionally, failing to use adequate ventilation when working with paper mache can be detrimental. The glue can emit fumes that may be unpleasant or irritating if inhaled. Choose a workspace that is well-ventilated to ensure a safe crafting environment.
Finally, many people underestimate the importance of patience and practice. Mastering paper mache requires time to learn the techniques and get familiar with the materials. By allowing yourself to experiment and learn from mistakes, you will improve your skills and create stunning recycled projects that showcase your creativity. Keep in mind that each attempt is a step towards mastery, so enjoy the process and don’t be afraid to try different methods.
Fun Projects for Kids and Adults
Crafting with recycled paper opens up a realm of exciting and imaginative projects that can be enjoyed by both kids and adults. From simple creations that ignite a child’s creativity to more intricate designs that adults can appreciate, there is something for everyone. Start by making colorful paper beads, perfect for bracelets or necklaces. Simply cut strips of paper and roll them tightly around a toothpick, applying glue to secure the ends. Once finished, varnish them for durability and shine; kids will love creating their own unique jewelry pieces.
Another delightful project is making custom bookmarks. Choose colorful pages from old magazines or books, and cut them into your desired shape and size. Decorate with stickers, stamps, or drawings to personalize each one. This project not only encourages reading but also serves as a great gift for fellow book lovers.
For a family activity, gather various cardboard boxes and challenge everyone to create a mini sculpture or diorama. This could be a forest scene, a cityscape, or even underwater worlds. The creativity will flow as you all work together, and the final pieces can be displayed proudly at home.
Creating greeting cards or thank-you notes from recycled paper is a fulfilling endeavor for adults. Using an assortment of textured paper, cut and fold to make elegant cards. Include personal messages and embellishments to make each card special, perfect for any occasion. This project promotes thoughtfulness while reducing waste, making it an eco-friendly choice.
Consider making a seasonal mobile using recycled paper shapes. Cut out festive designs — like leaves for autumn or snowflakes for winter — and hang them from a simple branch or a hoop. This project not only brightens your home but also provides a wonderful way to celebrate the changing seasons.
Engaging in these fun projects fosters communication, collaboration, and creativity. Working together on recycled projects cultivates strong connections and encourages a sense of accomplishment. So gather your materials and jump into the world of eco DIY! Your unique creations await, and every project is an opportunity for joy and self-expression. Enjoy the process, have fun, and let your imagination soar!
Tips for Enhancing Your Paper Crafts
- What types of recycled paper can I use for crafts?
- You can use a variety of recycled paper, including newspapers, magazines, wrapping paper, and colored cardboard. Each type adds a different texture and color to your projects, enhancing the overall aesthetic.
- Do I need any special tools for paper crafting?
- While basic tools like scissors and glue are essential, you may find that having a craft knife, cutting mat, and a ruler can help you achieve more intricate designs. Other tools like decorative scissors and hole punchers can also be beneficial depending on your project.
- How can I make my paper crafts more colorful?
- Incorporate colored paints, markers, or washi tape to add vibrant details to your paper crafts. You can also mix different types of recycled paper with various colors and patterns to create eye-catching designs.
- Can kids participate in paper crafts?
- Absolutely! Many paper crafts are suitable for children, especially simple projects like making bookmarks, paper beads, or collages. Just ensure that the materials and tools used are appropriate for their age to ensure safety while crafting.
- What are some eco-friendly adhesives I can use?
- Look for non-toxic and water-based glues, such as white school glue or eco-friendly craft glues. These options are better for the environment and generally safe for use in various paper projects.
- How do I store my paper crafting materials?
- Keep your materials organized in a dedicated crafting box or container to ensure easy access. Sorting items like paper, tools, and embellishments into labeled sections can help you find what you need and keep your workspace tidy.
- Do paper crafts require any special drying time?
- Yes, some paper crafts, particularly those using glue or paint, may need adequate drying time to achieve the best results. Make sure to check product instructions for drying times, as rushing can compromise the quality of your final project.